


Cereal Box Sides: A Complete Guide to Design, Dimensions, and Uses
Discover how premium packaging transforms your brand's perception and drives customer loyalty in today's competitive market.
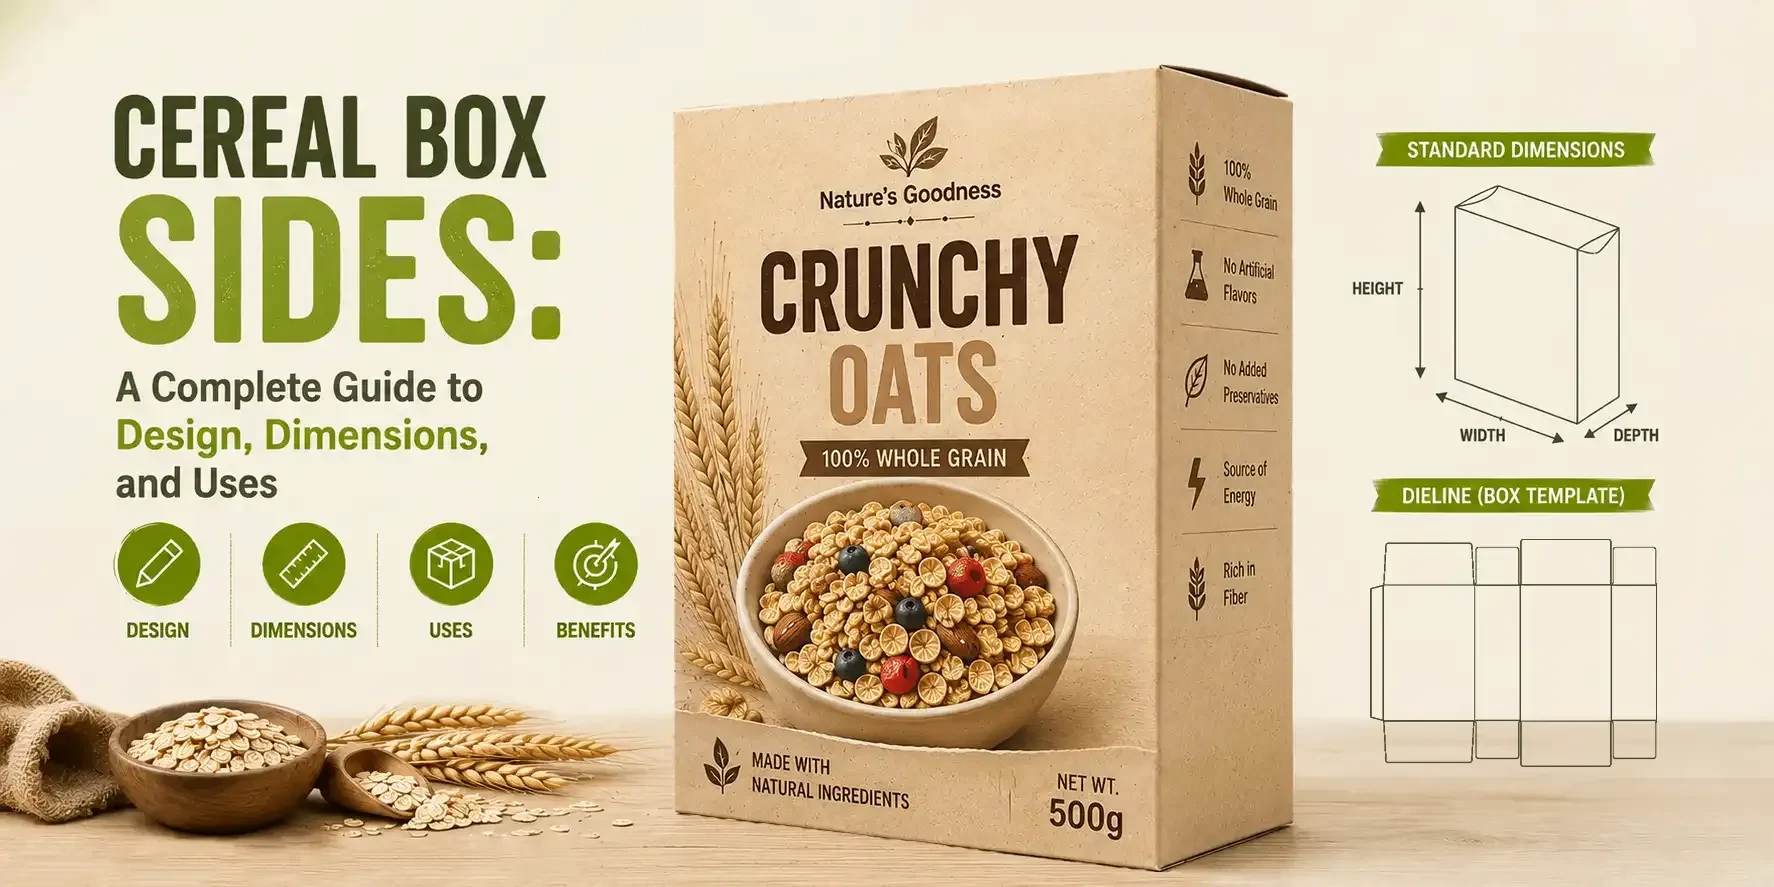
- Key Takeaways!
- Breaking Down Standard Cereal Box Dimensions and Panel Measurements - What You Need to Know
- The Anatomy of a Cereal Box: Exploring All Six Sides
- What Design Elements Can Go on Each Side of a Cereal Box?
- A Simple Visual Explanation of How the Printing Space Is Distributed Across a Cereal Box
- How Printing and Finishing Align With Various Cereal Box Uses
- Final Step: Choosing the Right Partner for Luxury Printed Cereal Boxes
Breakfast cereals have been part of our daily consumption for many years now, whether it is corn flakes, granola, muesli, oats, or children’s cereals. The product content may differ, but packaging ensures that the cereal is fresh, recognizable, and contains all the information required by consumers before purchase. Some cereals are packed in tall custom seal end boxes, while others are sold in compact cartons or family-size packs.
No matter the size, a standard rectangular cereal box typically has six panels, each serving a different purpose. When designed well, the package looks organized, establishes credibility, and reflects professional branding.
This guide explains all cereal box sides, their standard dimensions, and how every panel can be used to improve the box design without wasting valuable packaging space.
Read on to learn amazing facts in detail!
Key Takeaways!
- Cereal boxes have six panels, each with a specific purpose.
- Box size depends on product weight, serving size, and storage needs.
- The front presents the brand, product, flavor, image, and key claims.
- The back and sides carry nutrition, ingredients, allergens, recipes, and other details.
- The top and bottom handle opening information, promotions, batch codes, and dates.
- CMYK, PMS, lamination, UV coating, foil stamping, embossing, and debossing can be chosen based on the box's design and uses.
Breaking Down Standard Cereal Box Dimensions and Panel Measurements - What You Need to Know
Before looking at individual panels, it is important to understand the overall size of a cereal box. There isn't one fixed measurement that every manufacturer follows. Box dimensions usually depend on the cereal's weight, serving size, and the amount of shelf space the brand wants to occupy. A family-sized cereal box is naturally larger than a box made for single servings or travel packs.
Even so, most retail cereal packaging follows fairly similar proportions. These standard measurements make stacking, shipping, shelf display, and automated filling much easier during production.
When creating custom cereal boxes, manufacturers often start with these common dimensions and then adjust them to suit the product.
Common Cereal Box Dimensions
Box Type | Height | Width (Front Panel) | Depth (Side Panel) |
Small Cereal Box | 8-9 in | 5-6 in | 1.5-2 in |
Standard Cereal Box | 11-12 in | 7-8 in | 2–2.5 in |
Family Size Cereal Box | 13-14 in | 8-9 in | 2.5-3 in |
The exact measurements may vary depending on the cereal weight, packaging style, and brand requirements.
Why Are These Dimensions So Common?
These proportions have become the industry standard because they balance product protection with efficient storage. A taller front panel gives brands enough room for attractive graphics, while the narrower side panels leave space for nutrition facts, ingredients, and other mandatory information.
At the same time, the box remains easy to stack on retail shelves, pack into shipping cartons, and store in kitchen cabinets.
Brands that choose custom cereal box packaging can increase or reduce these measurements to accommodate different serving sizes, promotional packs, or premium product lines.
However, maintaining balanced proportions is important so every panel remains easy to read.
The Anatomy of a Cereal Box: Exploring All Six Sides
Every standard cereal box consists of six connected panels that fold together like a custom folding carton. The box is made up of two large panels, two narrow side panels, one top panel, and one bottom panel. Together, they provide enough area for branding, product information, and structural support.
Front Panel
The front panel is one of the two largest surfaces on the cereal box. Its width is equal to the box width, while its height extends from the top flap to the bottom fold. Since it offers the largest uninterrupted printable area, it serves as the primary face of the package.
Back Panel
The back panel matches the front panel in both height and width. It forms the opposite face of the carton and provides an equally large printing surface. Keeping the front and back panels the same size also helps maintain the box's structural balance.
Left Side Panel
The left side of the box is one of the two narrow vertical faces of a cereal box. It extends the full height of the carton, while its width is determined by the box depth. Although it offers less printable space than the front or back, its tall, narrow layout makes it well suited for structured content and contributes to the overall balance of the package.
Right Side Panel
The right side of the box mirrors the left side in both height and width, creating a symmetrical box structure. Positioned opposite the left side, it provides another vertical printing surface that complements the rest of the packaging. Together, both side faces strengthen the carton while making full use of the available printable area.
Top Panel
The top panel is created by the upper flaps that fold inward to close the box. Its dimensions are based on the box width and depth, making it considerably smaller than the front or back panels.
Bottom Panel
The bottom panel mirrors the dimensions of the top panel. It forms the base of the package and is constructed using folded flaps that lock together to support the weight of the cereal inside.
What Design Elements Can Go on Each Side of a Cereal Box?
A cereal box has limited space, so every panel is assigned specific information. The goal is to keep the packaging easy to navigate while ensuring customers can quickly find the details they need.
Instead of placing everything on one side, brands spread the design features across all six panels, giving each one a clear purpose.
Here's how the available space is typically used.
The Front Display: The First Thing Shoppers Notice
The front panel is where branding takes center stage. It should communicate what the product is within seconds. A clean layout, readable typography, and high-quality graphics all contribute to a stronger shelf presence.
What usually appears here? Read below:
- Brand logo
- Product name
- Cereal flavor or variety
- Product image
- Net weight
- Short product claims or highlights
- Promotional badges
Tip: Keep the front panel uncluttered. Too much text can distract customers from the product itself.
The Back Surface: A Space for Additional Information
Once the front panel grabs attention, the back panel provides room for additional content. Many cereal brands use this space to build a connection with customers instead of repeating information already printed elsewhere.
You'll often find:
- Brand story
- Recipes
- Fun facts
- Games or puzzles for children
- QR codes
- Seasonal promotions
- Sustainability messages
Side Panels: The Information Center
Unlike the front and back panels, the two side panels focus mainly on product information. Their narrow vertical layout is ideal for text-heavy content, allowing brands to print important details without searching across the entire package.
One side usually includes:
- Nutrition facts
- Serving size
- Daily value percentages
- Vitamins and minerals
The opposite side commonly features:
- Ingredients
- Allergen information
- Manufacturer details
- Barcode
- Storage instructions
- Recycling symbols
The Top Flap: The Box's Entry Point
Although it offers the least printable area, the top panel is still useful, especially when cereal boxes are stacked on shelves or inside shipping boxes. Brands can add custom printed stickers.
It may also include:
- Brand logo
- Product flavor
- Opening instructions
- Easy-open arrows
- Promotional text
Bottom Base: Reserved for Product Tracking
Customers rarely look underneath a cereal box while shopping, making the bottom panel the ideal place for technical information used during manufacturing, distribution, and inventory management.
Common details include:
- Batch number
- Best-before date
- Production code
- Factory identification
A Simple Visual Explanation of How the Printing Space Is Distributed Across a Cereal Box
Although a standard cereal box consists of six individual sides, the printable area is not shared equally among them. The size of each face determines how much design space is available, resulting in a natural distribution across the entire package.
Larger surfaces contribute a greater share of the artwork, while smaller sections provide limited but equally valuable space within the overall layout.
The illustration below shows the approximate share of printable space on a standard cereal box. These percentages are based on the proportions commonly found in retail cereal packaging and may vary slightly depending on the box dimensions and packaging style.
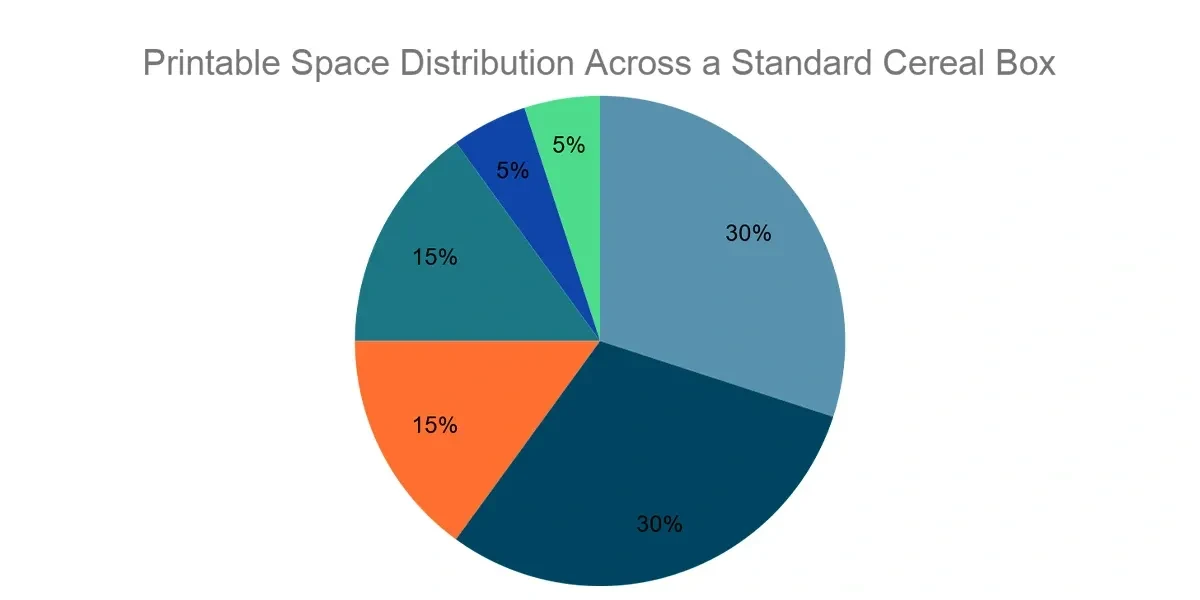
Approximate Percentage Distribution of Printable Space:
- Front Face: 30%
- Back Face: 30%
- Left Side: 15%
- Right Side: 15%
- Top Flap: 5%
- Bottom Base: 5%
Dividing the available space across all six sides creates a balanced layout that improves readability, supports a cleaner presentation, and ensures every part of the carton contributes to the finished package.
How Printing and Finishing Align With Various Cereal Box Uses
Cereal boxes are used for retail sales, children's cereals, organic foods, promotional campaigns, subscription orders, sample packs, and premium product lines. Each application requires print and finishing choices that suit the product, audience, and selling environment.
For retail sales, the box can clearly present the brand name, product details, nutrition facts, and key visuals. Children's cereals can feature bright colors, character illustrations, and engaging graphics, while organic products can use minimal layouts and natural-looking visuals. Promotional campaigns can highlight special offers, brand marks, and limited-edition releases.
Subscription orders and sample packs can feature seasonal graphics, different flavors, or smaller production runs. Premium boxes can use special surface treatments to emphasize logos, product names, and selected design details.
Common Printing Methods
- Digital and lithographic printing are popular choices for different types of custom food boxes, including cereal packaging.
- Inkjet printing and screen printing can also be applied.
Popular Finishing Options
Some finishes improve the appearance of the box, while others add protection to the printed surface.
- Matte lamination
- Gloss lamination
- Soft-touch lamination
- Spot UV coating
- Foil stamping
- Embossing
- Debossing
Choosing the right combination helps create packaging that looks neat, lasts longer, and presents the product clearly.
Final Step: Choosing the Right Partner for Luxury Printed Cereal Boxes
Understanding the six sides of a cereal box makes it easier to plan a package that is informative and well organized. From the front face that introduces the product to the smaller panels that carry nutritional details, ingredients, and production information, every side has a purpose.
Knowing how these sections work together helps you make better decisions when designing or ordering custom packaging.
If this guide has given you a clear idea of what can be printed on each side of a cereal box and you're ready to turn that knowledge into professionally printed packaging, the next step is finding a manufacturer that can make it to your specifications.
At BoxLark, you can customize everything from box dimensions to printing, finishes, and specialty add-ons.
To discuss your requirements, request a free quote, or place an order, simply contact the team at sales@boxlark.com.